Water damage is a homeowner’s nightmare, capable of wreaking havoc on your property’s structural integrity and aesthetics, as well as your own peace of mind.
From unseen leaks to catastrophic floods, water damage can strike at any time, making it essential to be vigilant and proactive in protecting your home. One crucial step in safeguarding your property is a water damage inspection. This often is the precursor to water damage restoration.
In this blog, we’ll delve into the world of water damage and the pivotal role that a water damage inspection plays in maintaining the health and longevity of your home. We’ll explore what a water damage inspection entails, common causes of water damage, the signs that indicate you need an inspection, the inspection process, and much more.
What Is a Water Damage Inspection?
A water damage inspection involves a water damage professional coming to your home and thoroughly examining it for signs of water damage.
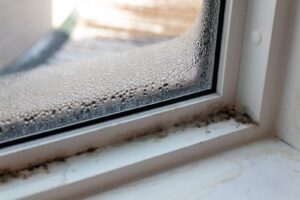
If you’re noticing water stains, musty odors, warped/sagging floors, mold growth, increased utility bills, or peeling/bubbling paint, you should have a water inspection to see if water damage is the underlying cause.
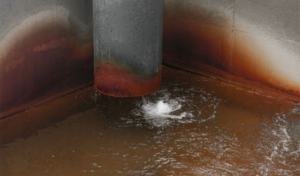
You might wonder how on earth water damage could have happened to your property. As it turns out, there are multiple ways that water damage might sneak its way into your home. Examples include:
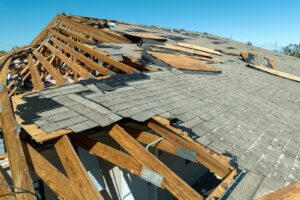
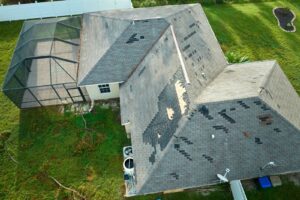
- Leaky roofs
- Plumbing issues
- Floods and storms
- Appliance malfunctions
- Poorly maintained gutters
- Sewage backups
- Foundation cracks
- Condensation and humidity
If you’ve experienced any of these issues and are noticing any other signs of water damage, it’s time to call the professionals.
The Inspection Process
When you schedule a water damage inspection, anticipate a thorough, systematic process by a professional inspector. Here’s a detailed look at each inspection stage:
Initial Assessment
The process often begins with a brief discussion between you and the inspector. This is your chance to share any concerns or observations about water-related issues in your home. This conversation helps the inspector focus on specific areas of interest.
The inspector may ask about the history of water-related incidents or repairs in your home. Any relevant documentation or previous inspections can be helpful in the inspection.
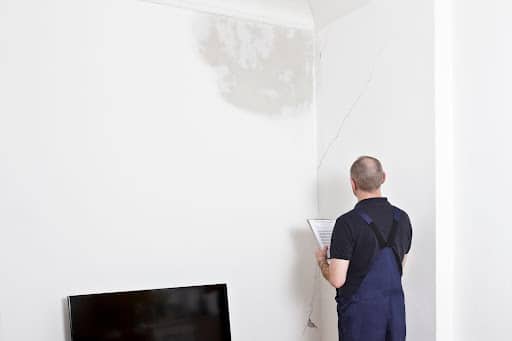
Visual Inspection
The inspector will typically start by examining the exterior of your home. This includes inspecting the roof, gutters, downspouts, siding, and the foundation. They will look for visible signs of damage or areas where water could enter.
The inspector will check your home’s ceilings, walls, floors, and structural elements like beams and columns. They’ll look for stains, discoloration, warping, or other visible signs of water damage.
Plumbing fixtures, such as sinks, toilets, and showers, will be inspected for leaks or signs of moisture.
The inspector will examine appliances like water heaters, washing machines, and HVAC systems for any water-related issues. The inspector will also inspect utility areas like basements and crawlspaces.
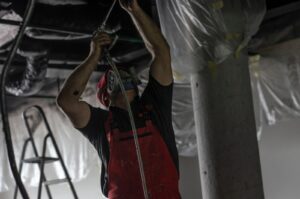
The inspector will use moisture meters and sensors to measure the moisture levels in various materials, such as drywall, wood, and insulation. Elevated moisture readings often indicate a problem, even if no visible signs of damage are present.
Moisture Detection
Moisture detection is a critical part of the inspection process. Professional inspectors use specialized tools like infrared cameras and moisture meters to detect hidden moisture behind walls or under floors. These tools identify problem areas that may not be visible to the naked eye.
In some cases, inspectors might use moisture probes to test the moisture content of materials. This helps determine the extent of damage and whether any remediation is required.
Damage Assessment
Based on the visual inspection and moisture readings, the inspector will identify problem areas and assess the extent of the damage. They will also try to determine the root cause of the issue, whether it’s a leaky roof, a plumbing problem, or another source.
Inspectors typically document their findings, which may include photographs and detailed notes. This documentation is valuable for insurance claims or future reference.
The Importance of a Professional Inspector
Professional inspectors have the knowledge and experience to identify subtle signs of water damage and its potential causes. A good inspector will provide accurate assessments and recommendations.
Inspectors often offer advice on preventing future water damage and may suggest mitigation measures to minimize further issues.
Specialized Equipment
Inspectors use infrared cameras, moisture meters, borescopes, and hygrometers to determine how bad the water damage is.
- Infrared cameras detect temperature variations caused by moisture, helping locate hidden leaks or damp areas.
- Moisture meters measure moisture levels in building materials, providing quantitative data for assessment.
- Borescopes are long devices with an eyepiece or display on one end and a lens or small camera on the other. They are used for confined spaces like wall cavities or plumbing pipes.
- Hygrometers measure humidity levels, which is crucial for understanding moisture-related problems.
As you can see, a water damage inspection is a comprehensive process designed to detect water damage, enabling you to restore your home.

How To Prepare for a Water Damage Inspection
Preparing for a water damage inspection is a proactive step that helps ensure a thorough assessment and timely identification of any issues. Here’s your list of things to do to prepare.
1. Gather Documentation:
Collect relevant documents, such as past inspection reports, repair records, or maintenance logs related to your home’s water systems. These documents provide valuable context for the inspector.
2. Make a List of Concerns:
Before the inspection, make a list of specific concerns or areas where you suspect water damage might be present. Note any visible signs or unusual occurrences, such as water stains, odors, or previous leaks.
3. Provide Clear Access to Inspection Areas:
Ensure that the inspector has easy access to all areas of your home that need inspection. These areas include basements, crawl spaces, attics, utility rooms, bathrooms, kitchens, and any other relevant spaces. Move furniture or stored items that may block access.
4. Provide Information:
When the inspector arrives, be prepared to discuss any history of water-related issues or repairs. Share your list of concerns and any documentation you’ve gathered. The more information you provide, the better the inspector can focus on specific problem areas.
5. Be Available During the Inspection:
While you don’t need to hover over the inspector, being available to answer questions or provide access to certain areas is helpful. The inspector might have inquiries or need to discuss findings with you during the inspection.
6. Prepare for Testing:
Be ready for the inspector to use specialized equipment to detect moisture and assess damage. Using this equipment may involve drilling small holes to access wall cavities or using moisture meters to measure moisture levels in various materials. These procedures are standard in water damage inspections and help ensure accuracy.
7. Remove Valuables and Personal Items:
In areas where the inspector will be working, remove valuable or personal items that could be affected by the inspection process. This includes sensitive electronics, important documents, and items that could be damaged by dust or debris.
8. Secure Pets:
If you have pets, consider securing pets safely and comfortably away from the inspection zones. Securing your pets helps prevent interference and ensures the inspector’s (and pets’) safety.
9. Be Patient:
Water damage inspections take time, depending on the size and complexity of your home. Be patient, and allow the inspector time to conduct a thorough assessment.
10. Ask Questions:
Feel freee to ask questions during or after the inspection. If the inspector identifies issues, inquire about their severity, potential causes, and recommended actions for repair or mitigation.
11. Follow Up:
Follow up with the inspector to discuss the findings and recommendations after the inspection. If necessary, take prompt action to address any identified water damage issues to prevent further damage and ensure the safety and integrity of your home.
Preparing for a water damage inspection is a proactive approach to home maintenance that can save you time, money, and stress in the long run. By cooperating with the inspector and providing relevant information, you help ensure a comprehensive assessment of your property’s water-related concerns.
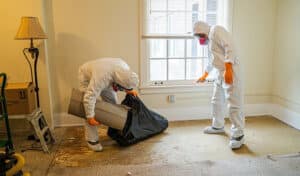
Water Damage Restoration With Restoremasters
If you’ve recognized any signs of water damage or it’s time for a proactive inspection, contact our team of experts at Restoremasters. With years of experience and a commitment to excellence, we specialize in comprehensive water damage inspection and restoration services.
Our dedicated professionals will conduct a thorough inspection, identify hidden issues, and provide you with a clear action plan. Whether you’re dealing with a minor leak or a major water-related disaster, Restoremasters has the expertise and state-of-the-art equipment to restore your home to its pre-damage condition.
Don’t let water damage compromise your home’s integrity or your family’s well-being. Contact Restoremasters today, or call us at 801.948.2478 for all your water damage inspection and water damage restoration needs. Your home deserves the best, and we’re here to deliver it.